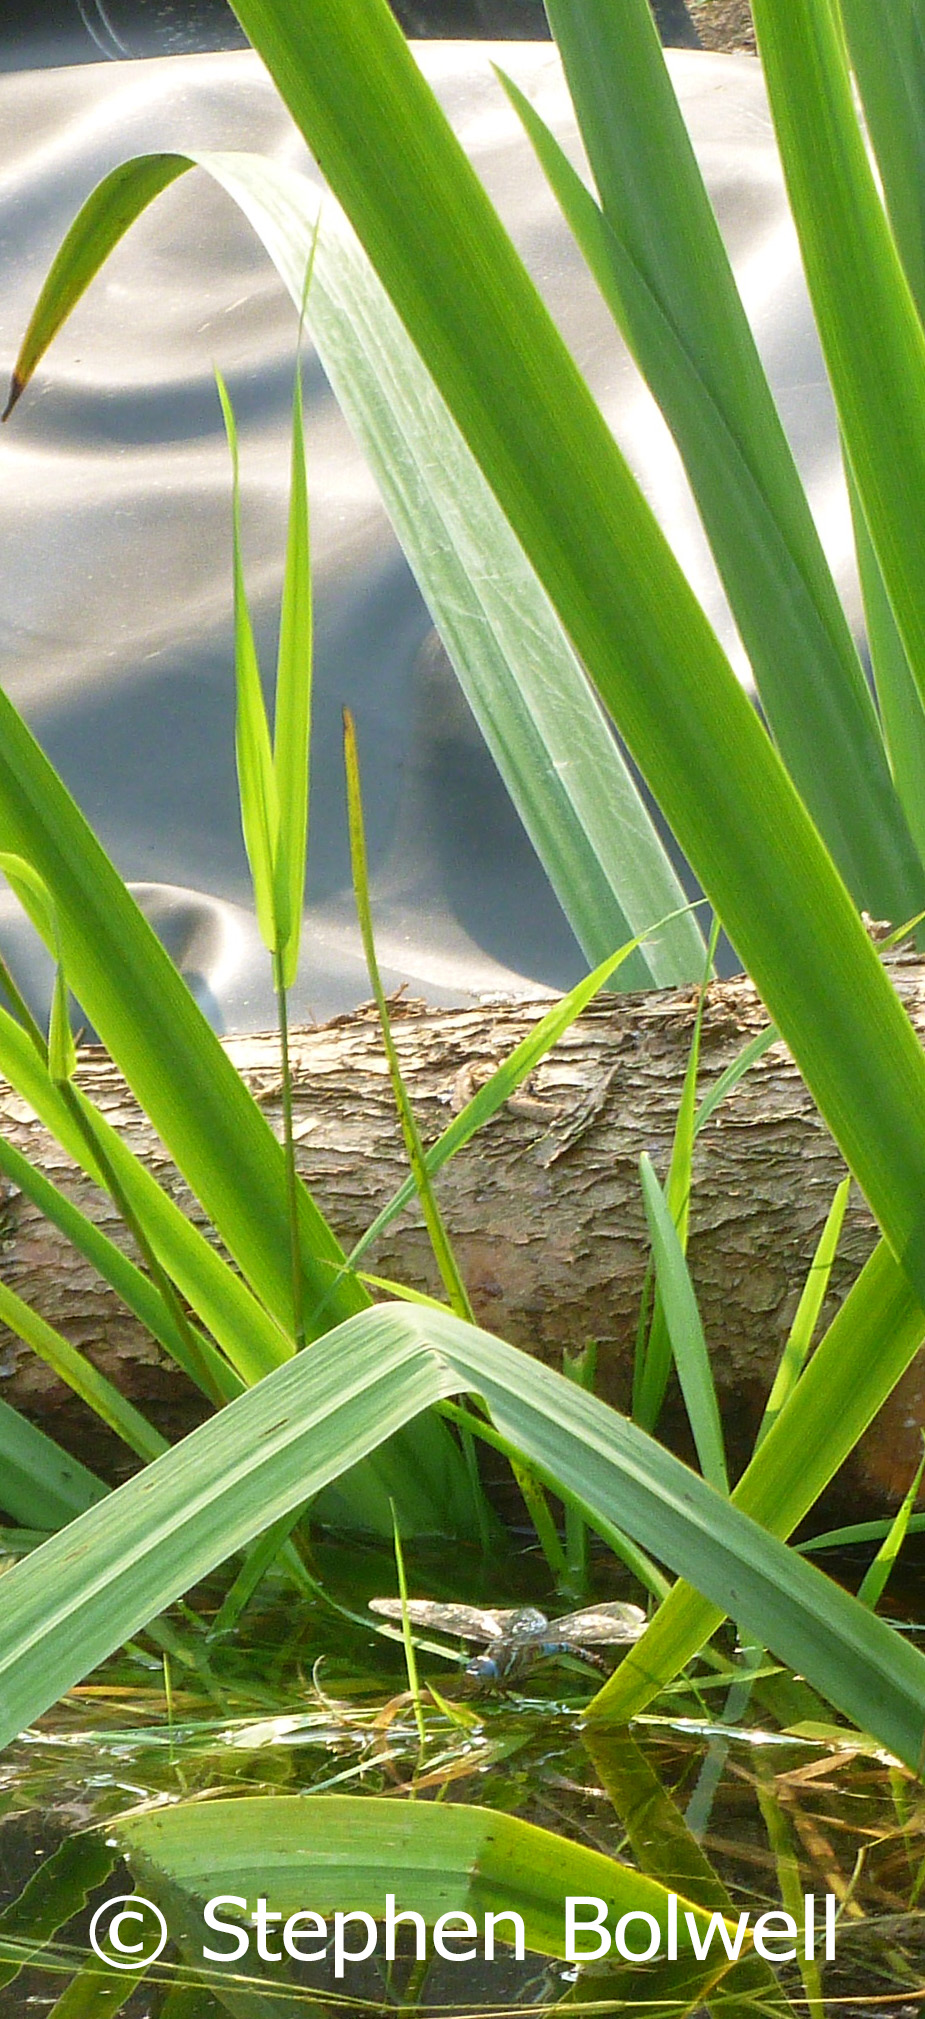
During the summer dragonflies arrive to fly over our garden in numbers – they simply come to feed on insects – taking a break from the hassles that life throws at them when they are hanging around their breeding pond. I have counted as many as a dozen at any one time doing circuits and bumps, and none could truly be described as resident… But, as soon as our new pond was filled with water, a male instantly took to patrolling and hovering in front of me as I worked; the insistence that this was now his territory was encouraging.
Later that day a couple of females of the same species arrived; and with a metallic rattle of wings seemed held by the glimmering surface as if drawn by a magnet. Soon they began laying eggs, which was impressive for a pond that was only a day and a half old. Clearly, when you get things right nature quickly lets you know.
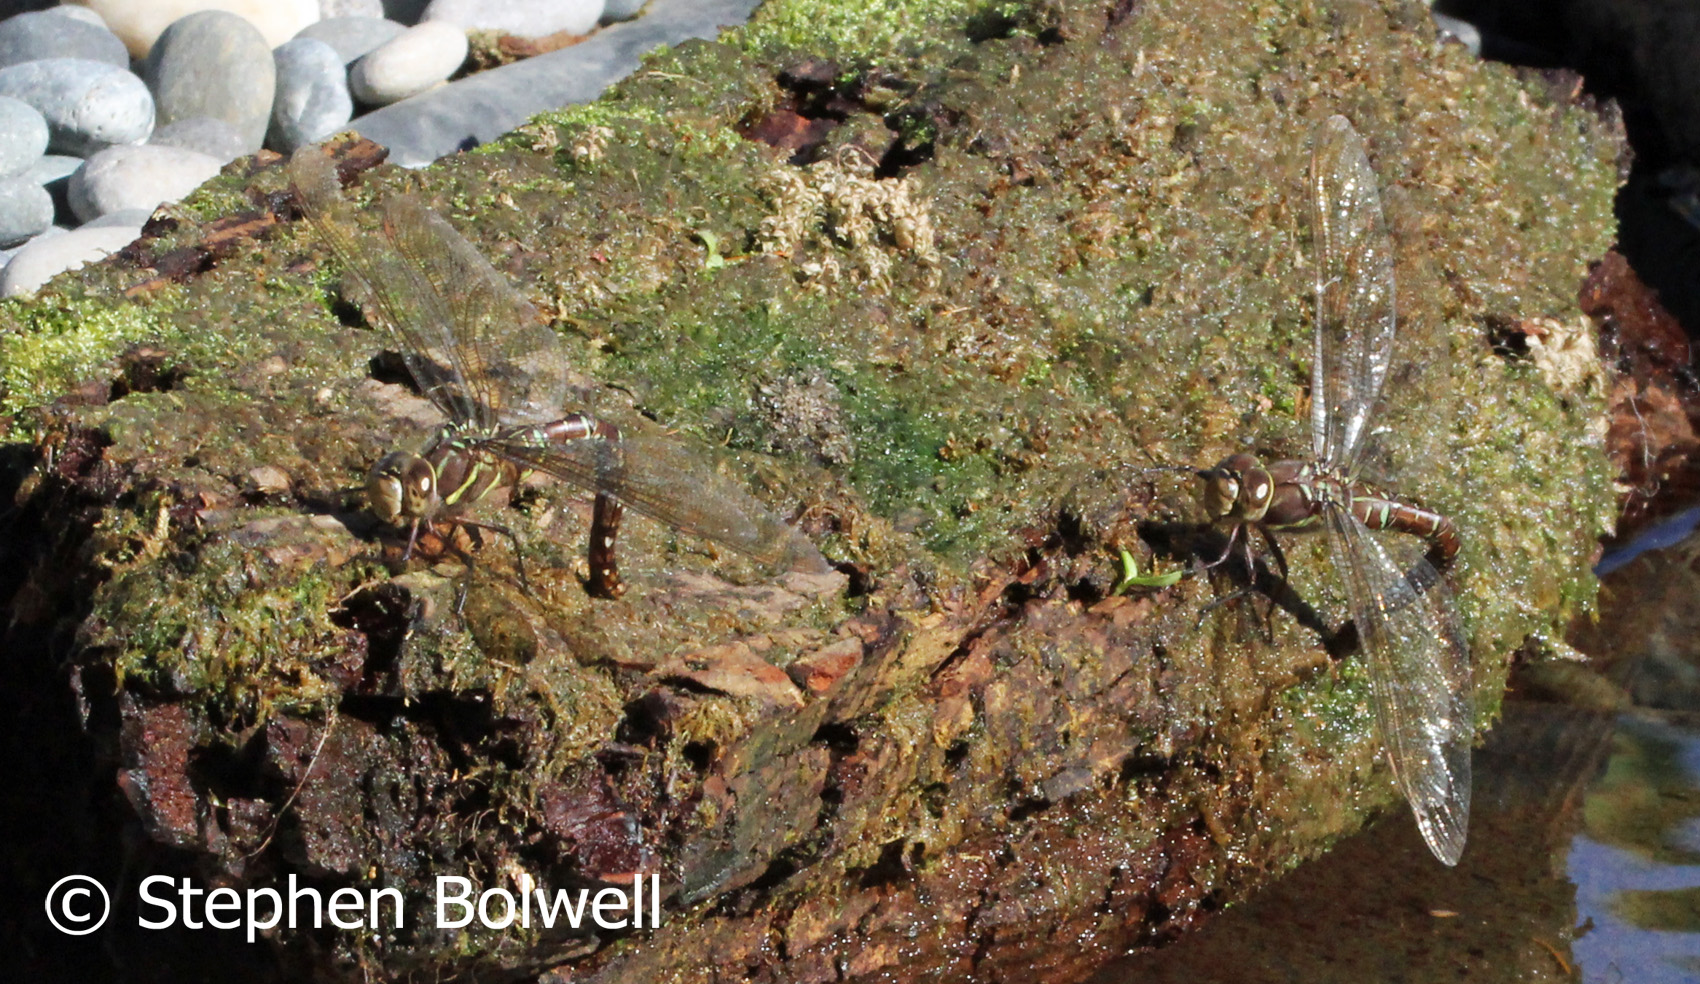
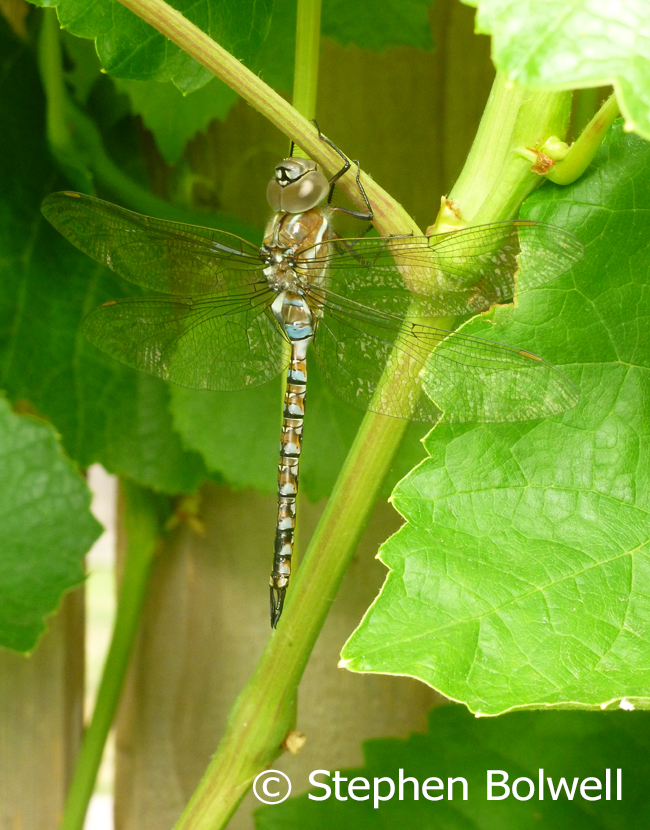
Darners are large dragonflies so named because their abdomens are long and thin; which must have suggested to somebody in the past that they looked like darning needles.
At first the females laid their eggs in the water, with their abdomens partially submerged, but when the pond was about three weeks old and summer was turning to fall they began laying in the grooves of log bark above the waterline. I wondered if they had perhaps lost their senses, but then considered they might be enhancing the chances of their eggs hatching as water temepratures began to drop and warmer conditions prevailed above the waterline during daylight hours.
Within a few days it came onto rain heavily which is to be expected on Canada’s west coast at this time of year and soon the logs at the ponds edge were partially submerged. Millions of years of evolution has selected for the most exacting behaviours, but maybe I am making a naturalist’s observation here that won’t hold up under more careful scrutiny – there’s a science project here for somebody – I’ve seen successful Phd’s start out on flimsier grounds.
The arrival of my first ‘true’ bugs.
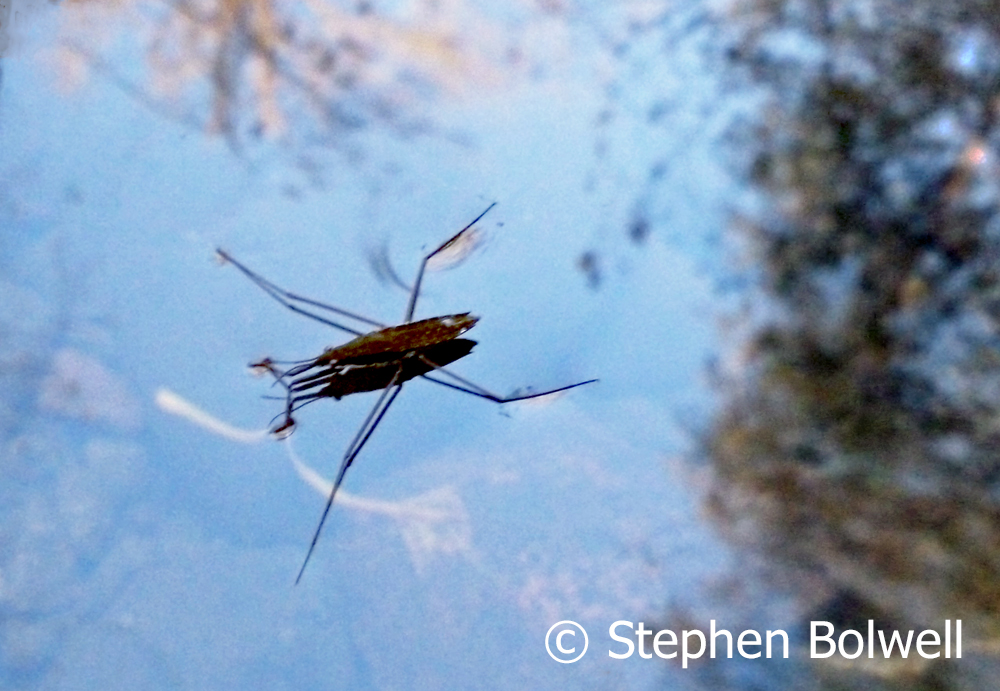
W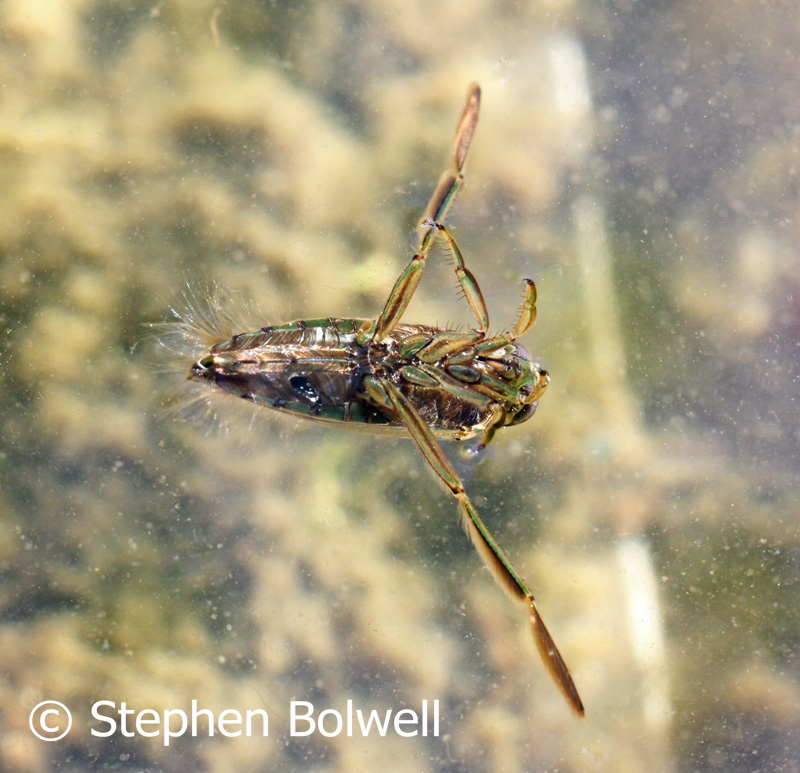 ithin a couple of weeks I saw two water boatmen fly in: one landed on the water and dived down before quickly returning to the surface; it took off at once but dropped straight back through the silver mirror as if this extraordinary insect couldn’t quite believe its luck. Over the same period half a dozen pond skaters also showed up and were soon busy feeding on insects unlucky enough to have fallen onto the water’s surface.

Much of the photography that I do is exacting, but if the situation allows I prefer to work quickly, which is often necessary when photographing wildlife. Sitting around waiting for stuff to happen is a waste of time; so, usually I set my camera up on a tripod and get busy doing other things until something does.
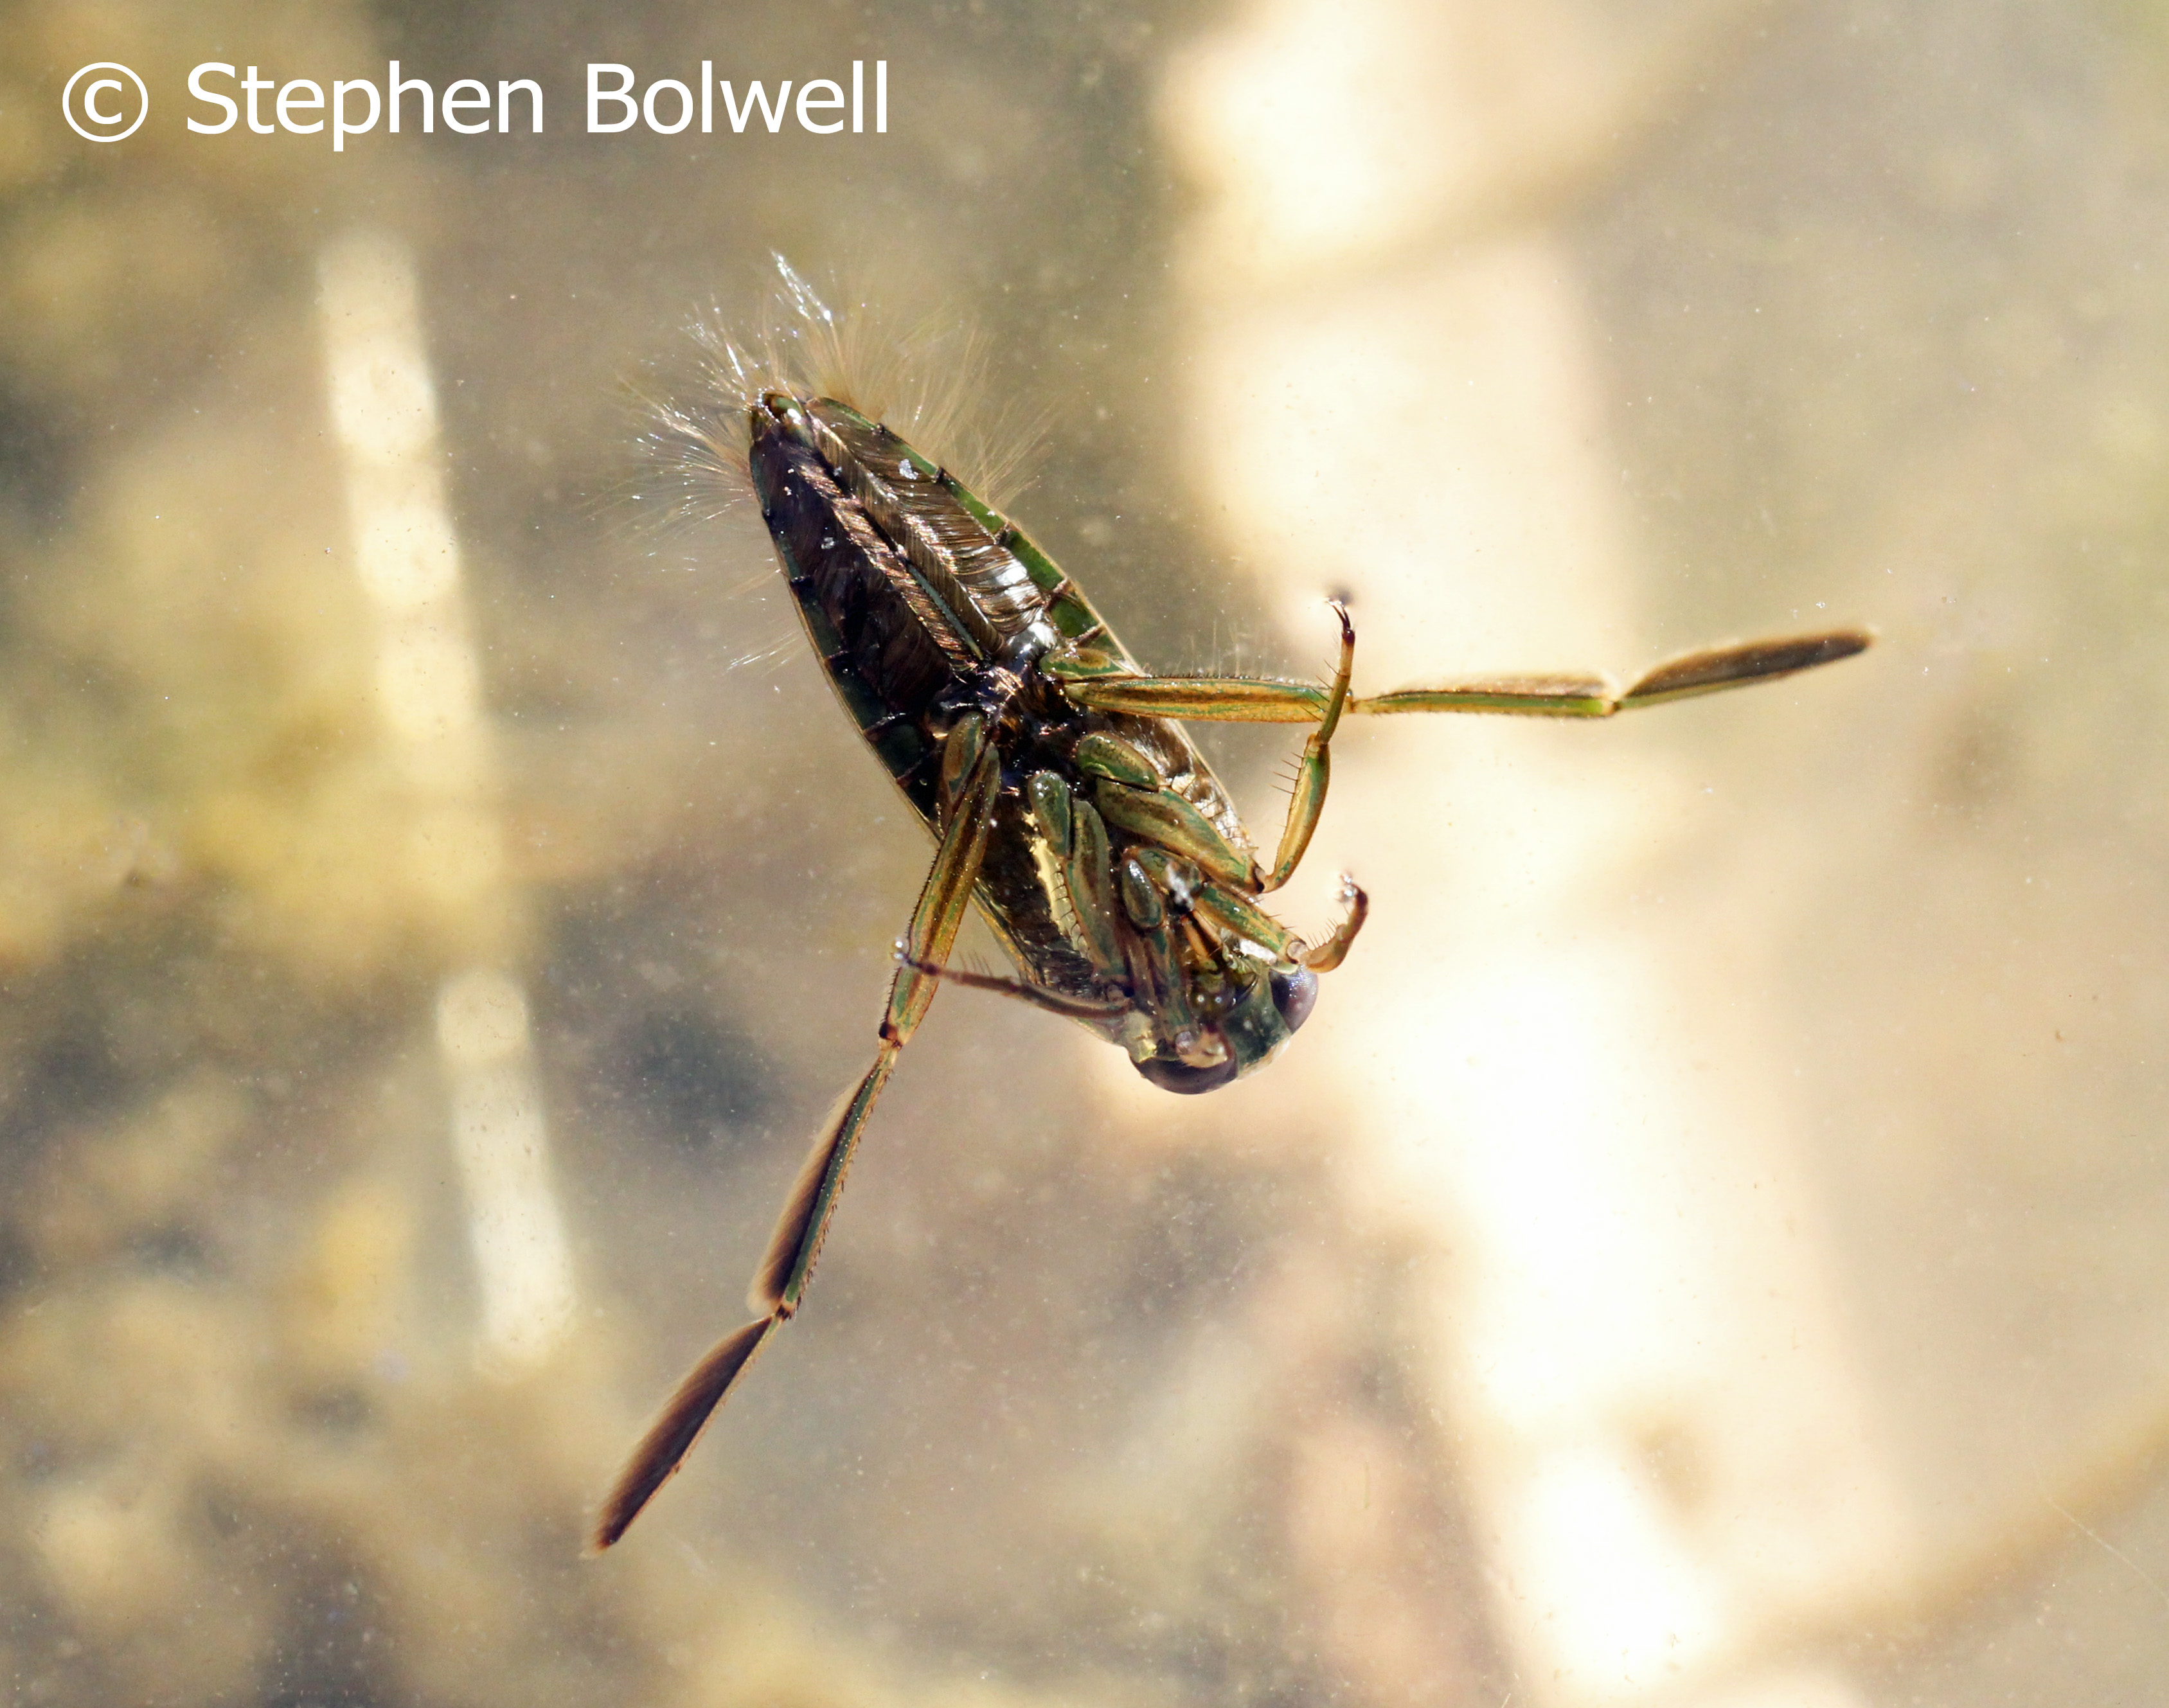
This water boatman was removed from the pond using a net and then photographed in a small plastic salad box (left outdoors to collect rainwater to benefit indoor plants). The container has developed a film of algae across its base and various bits of vegetable material have fallen in, providing a background that looks very natural.
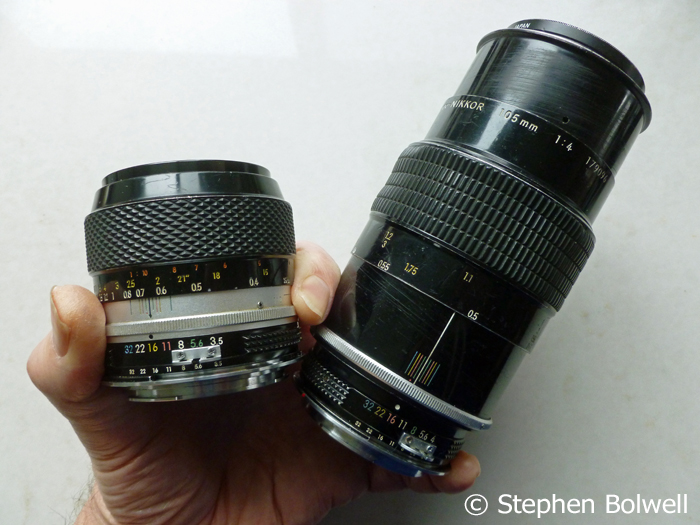
I used a more than five year old Canon 60D digital camera, with a favoured 55mm Micro-NIKKOR lens – this purchased secondhand in the mid-1970s when I first started filming wildlife for the B.B.C.. For many years it travelled around the world with me surviving everything from the fine dust of deserts, to the humidity of tropical forests. It has never been taken to bits to be cleaned and is as good today as when I bought it.
Some of these early lenses are said to be better optically than many made today – I won’t make that claim, but without doubt they are tougher. I used a conversion ring bought for less than $10 to attach the NIKKOR micro lens to my Canon: but don’t attach any non-standard lenses to your camera until you have checked that doing so will not cause damage – in particular to the metering system.
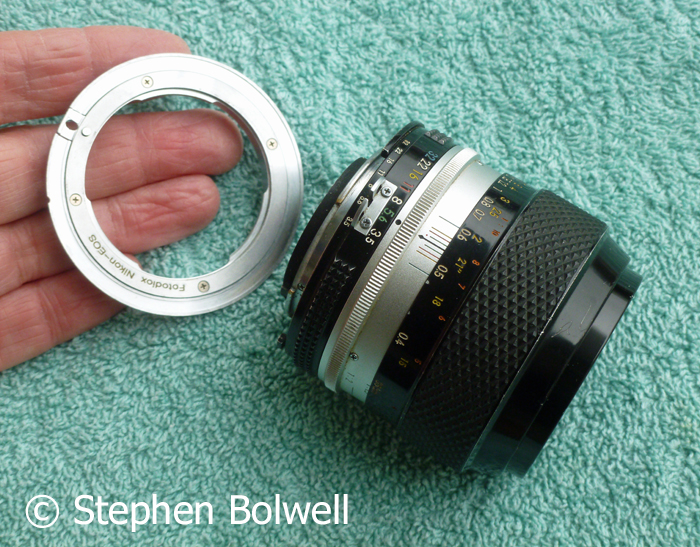
If there are no obstructions and the lens fits easily there should be no problems, but it is important not to suddenly flood the camera’s sensor with light as this may cause irrepairable damage.
Old Nikon lenses prior to1959 won’t fit on new Nikon cameras let alone Canon cameras, but F mount lenses made after 1959 will attach to new 35 mm SLR Nikon bodies. I can therefore fit my old Nikon lenses to my Nikon D5200 or to my SLR Canon cameras although I don’t expect to achieve either automatic metering or focus. I often set apertures and speeds manually, so this isn’t a problem as I’ve been looking through cameras for many years now, and can guess settings fairly accurately without using a metre and still get things in focus by twiddling a focus ring.
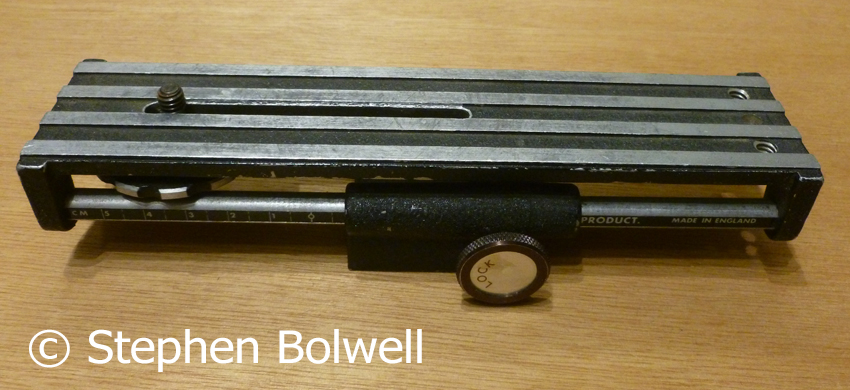
I utilized a small four and a quarter inch (11cm) square bathroom tile mirror to reflect sunlight back onto the bug. Lying on the ground, supported on my elbows, I took a deep breath and snapped several pictures, holding the camera in my right hand, because the mirror was in my left. Two elbows and a torso can make a fairly stable tripod for speeds faster than 1/60th second, but you really shouldn’t expect pin sharp images when doing macro or telephoto work without a tripod. Focus was made by simply moving my head and camera backwards and forwards, having already preselected a point of focus my turning the lens ring. When using a tripod I have a mount (pictured below) that allows the camera to be moved back and forth along two straight bars; this looks very professional, but I rarely attach it for stills photography, preferring instead to push the back leg of my tripod with my foot which achieves a similar result and often more quickly. Sometimes working fast is of the essence and it really doesn’t matter how you get the job done.
I spent twenty minutes on the project, taking perhaps a dozen pictures, two of which have been reproduced in this article. The water boatman was soon returned to the pond, presumably now believing in God, and busy converting other water boatmen to his beliefs as they arrive on a daily basis. But, so far, he is the only one to have seen that special light that shone from above; as for the others – well, they just think they have.
Under the circumstances, the pictures I took were reasonable, demonstrating that it is possible to get good close ups without great expenditure. The main reason I started my career with macro photography was, that in the early days, I couldn’t afford the quality telephoto lenses necessary to take good pictures of animals inclined to keep their distance. Everybody has to start somewhere, but once you get the hang of it, most photography is a piece of cake – just as long as you put the time in to practice – in my case that would be around 40 years. And the other thing… if set to automatic modern cameras do almost everything for you – so, what’s not to like?
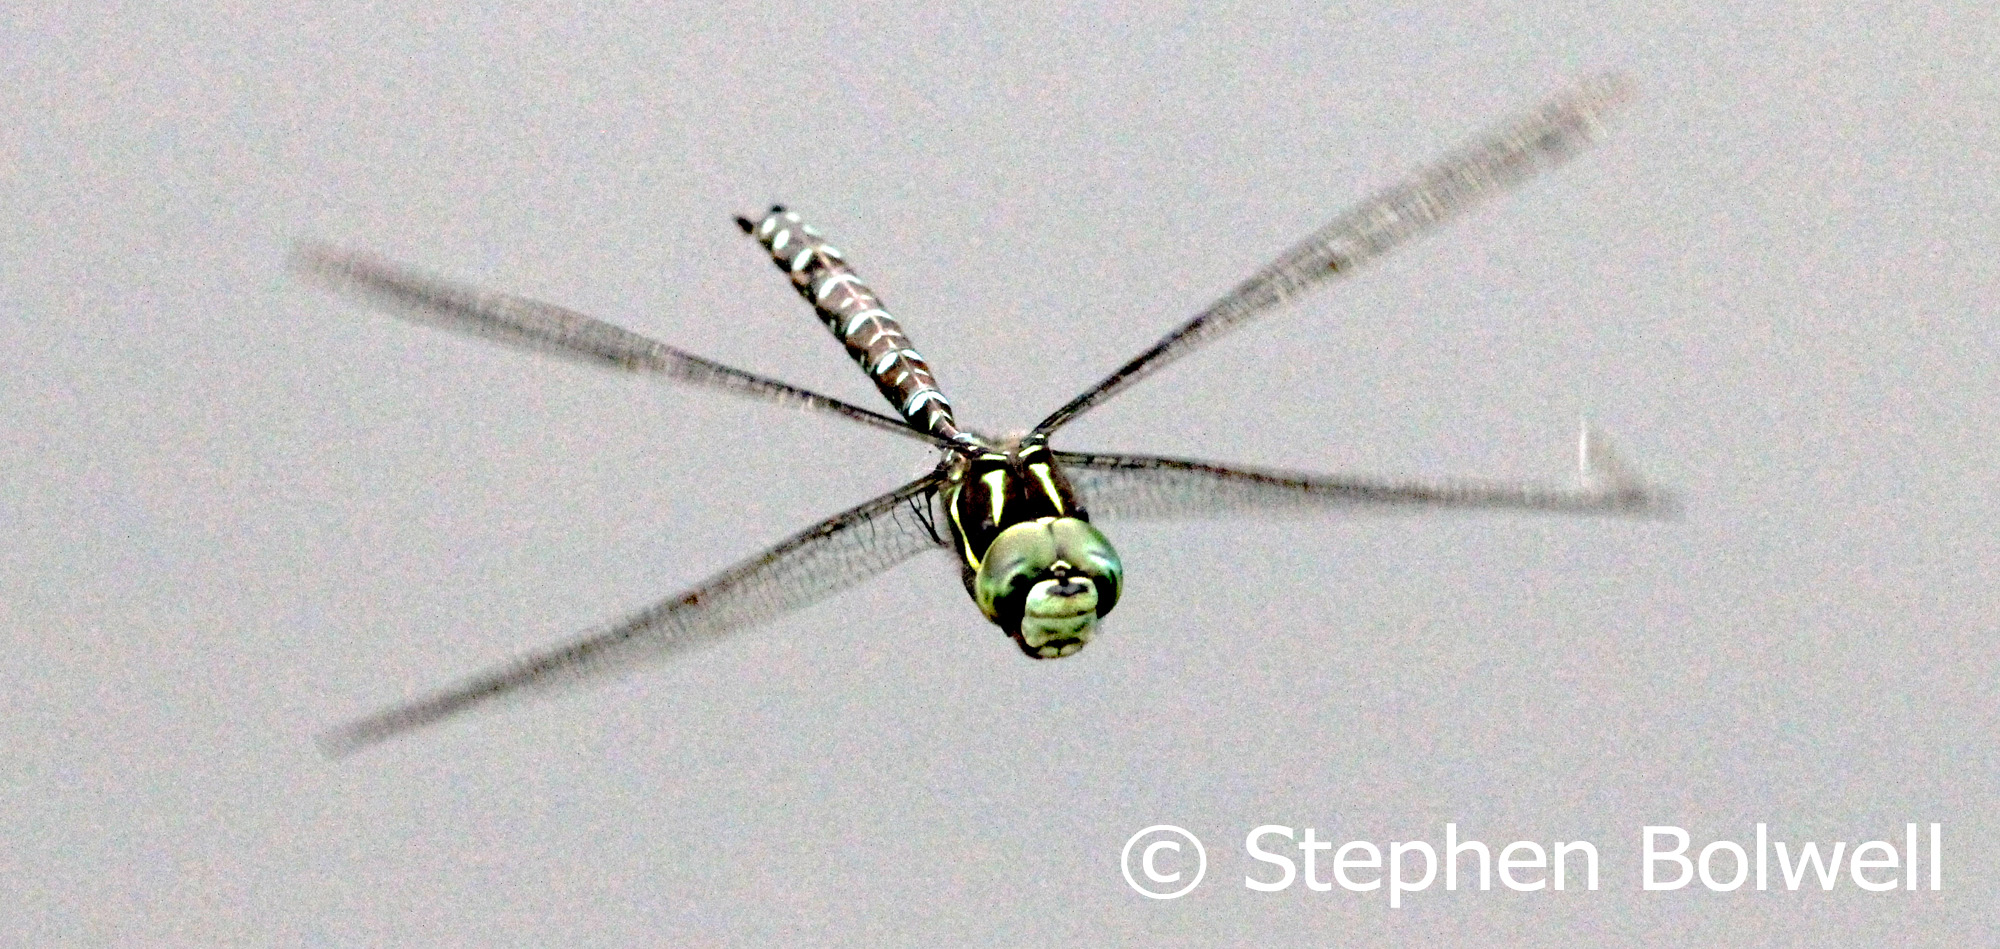
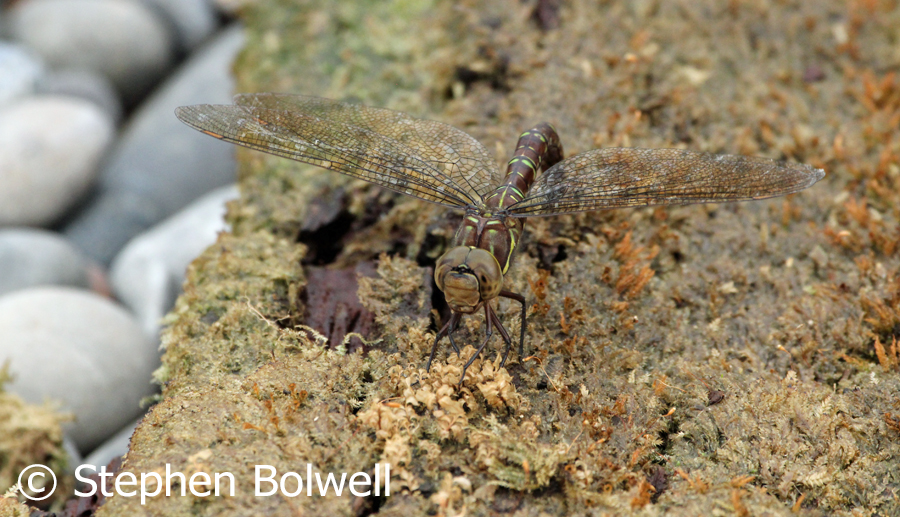
The large darner dragonflies
that arrived almost as soon as the pond was filled, were I thought, best photographed using a long lens around 400mm., at the shortest point I could make the thing focus; I set my working distance a little beyond to give some focusing leeway, and was just far enough away to avoid disturbing my subject, providing I moved slowly.
Many manufacturers produce close up (macro or micro) lenses that are set around 100mm or less, but at these focal lengths it is necessary to get very close to a subject (as was the case with the water boatman). But most flying predatory insects have well developed eyes sensitive to visual disturbance; and dragonflies are near the top of the list.
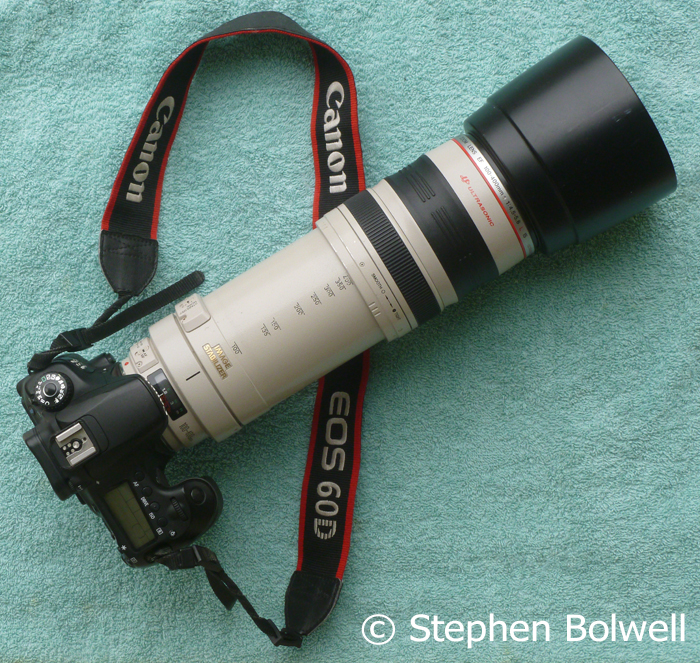
I used a 100-400mm Canon zoom for all the dragonfly pictures but one; and common to many upmarket telephoto zooms, this is a bulky, heavy and expensive item. Using cheaper lenses usually involves compromise, and may involve a loss of definition at the long end of the zoom, which is frequently down to the lenses inability to stabalize a moving object at a distance.
On a fixed 400mm lens, a sight made from an old wire coat hanger can be looped around the lens hood to quickly target a subject, but when using a zoom, I find it just as easy to locate subjects using the 100mm wide end and crash zoom in to the full 400mm. Even the excellent Canon zoom has issues when fully zoomed in – although the updated 100-400mm US II has superior stabilizing capabilities and regarded as a better lens. However, the problem is less noticeable on the older lens when framing small animals that are close, and better still when they are hardly moving, a situation that is improved by always using a tripod.
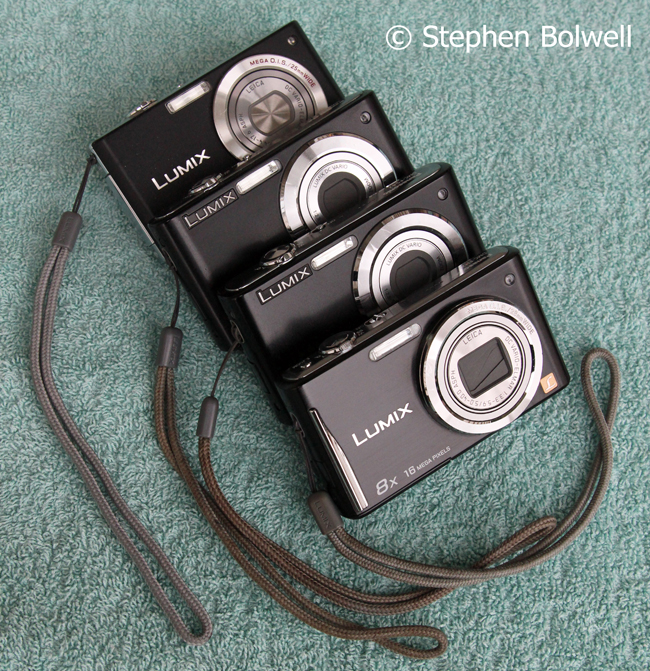
Under extreme circumstances, expensive gear usually produces better results – for example, the provision of an extra stop to open the lens up when working in low light conditions and still maintain image quality; this a plus for many photographers, but such additions don’t come cheap. The good news is that there are many less expensive cameras without all the bells and whistles that can still produce good results under optimal conditions.
Photography essentially boils down to three things: the focal length of a lens, the framing of an image… and finally, making a correct exposure. Assume for arguments sake that the focal length of the lens is fixed and that most of us can frame an image (although this isn’t a given), the only thing left to consider is, how best to achieve the exposure. And that’s a tricky because different shutter speeds and apertures will produce different results: a slow shutter speed will provide motion blur on a moving object for example, and the lenses aperture will affect the crispness of an image as well as how much of the subject is in focus from front to back.
There is a simple relationship between shutter speed and lens aperture for making an exposure – it’s a wedding of compromise: because the amount of light needed for an exposure is an constant, an increase in shutter speed inevitably requires a reduction of lens apeture and visa versa. These blocks of time and aperture are conveniently equal on your camera set up and so changing a setting is simple, although many people prefer to rely entirely on fully automatic settings, but because the various combinations are capable of such different results, it is helpful to understand which works best for the picture you want to achieve.
It is also important to recognize that different lenses have different focal lengths and each of these changes the look and perspective of a picture, with none of them exactly duplicating the way we see things with our eyes. Photography relies to a large extent upon illusion, utilizing the brain’s habit of rejigging what we see to make sense of the outside world, essentially tapping into our innate ability to recognize the familiar.
It was fun for a moment to claim a compromise of the wedded couple, shutter speed and lens aperture, but there is a third consideration that makes this match into a love triangle – the new variable is a change of emulsion speed (when film is used), or an increase in sensor sensitivity with a digital camera, with the result that pictures may be taken in lower levels of light. There is however, no such thing as a free lunch – faster emulsions produce grainier images; and now that film emulsions have been superceded by camera sensors, the grain has been replaced by another form of degradation termed ‘noise’. Having said that, the technological advances of digital cameras has progressed so rapidly in recent years, that some can now produce very good pictures in extremely low light.
I’ve left the best bit till last –
there’s one thing in particular that is crucial to the way a macro picture will look and that is ‘depth of field’, which is especially important to the wildlife pictures I’ve taken here. When a lens is stopped down to make the aperture smaller, ‘depth of field’ increases. Put simply, ‘depth of field’ is everything that is in focus from front to back either side of the exact point you choose to most critically focus. A lot of other stuff matters as well, for example – the focal length of the lens, and how close you are to the subject… but these things often cloud the issue and no matter what you hear, the key thing to remember is that you can’t defy physics.
If you take a picture from the same position and from the same distance, the ‘depth of field’, both with a wide angle and then a telephoto lens, remains the same. What happens is, a wide angle lens magnifies the subject less than a telephoto lens, and consequently more of the image appears to be in focus. Because I’ve never read a book on photography or taken a lesson on the subject, it took me seven years to figure this out; and believe me, what you work out for yourself, rather than accept from others without question, leaves less room for doubt. Most of the differences we notice relate to the lenses that we use and the distance we use them at.
A lot of people like to use low f stop numbers to create a very narrow ‘depth of field’; because doing so concentrates interest on just one region of the picture. For example a portrait photographer might use an 80mm lens, (often regarded as the best focal length to most naturally render a human head and shoulders), and focus on the eyes whilst opening the lens aperture up to maximum – this creates a very shallow depth of field, drawing attention to the eyes, by throwing quite a lot else out of focus – in particular the background, making for a very stylized kind of picture. Focus is therefore critical when using wide open apertures on all but the widest angle lenses, and getting eyes perfectly in focus might mean the even the tip of a nose won’t be sharp, especially if your subject is a regular Pinocchio.
I mention this to highlight that there are many different ways to take photographs and perhaps because a lot of my film career has featured small animals, I have moved in the opposite direction to this portrait photography style, using macro lenses and stopping them down to f16, f22 and f32 to achieve the greater depth of field I can. Sometimes this requires more light than nature can provide and I have in the past used artificial cold light in a studio situation (because many insects aren’t so much troubled by light as by heat), although I prefer when I can to use only natural light and mirrors. Optimally the lens is giving its best results around f8 to f11, but when taking macro pictures I usually consider a greater depth of field to be my priority.
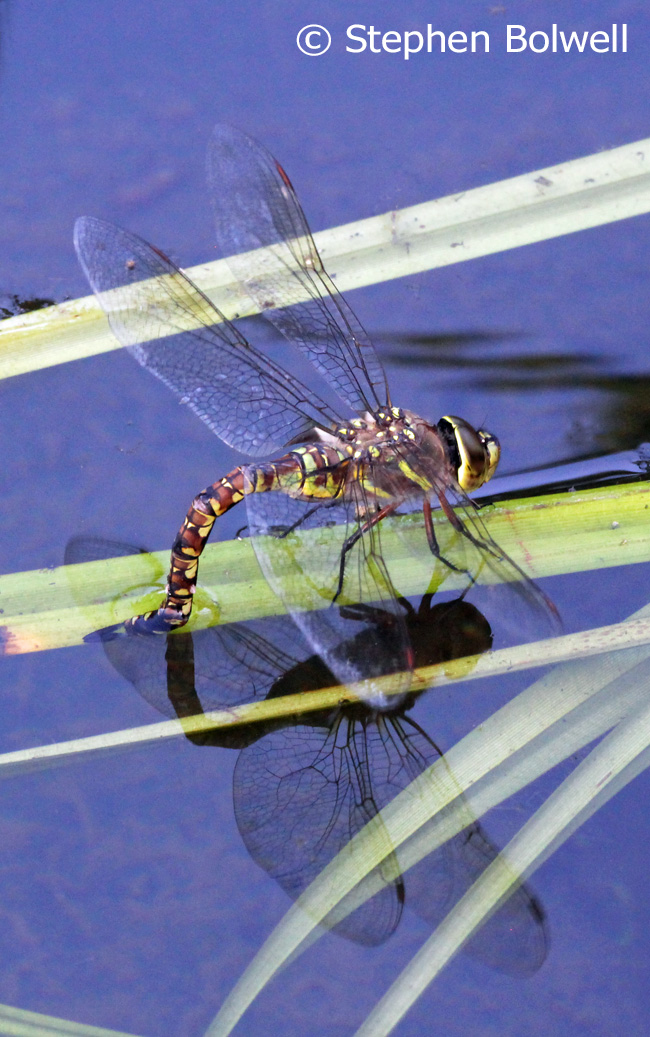
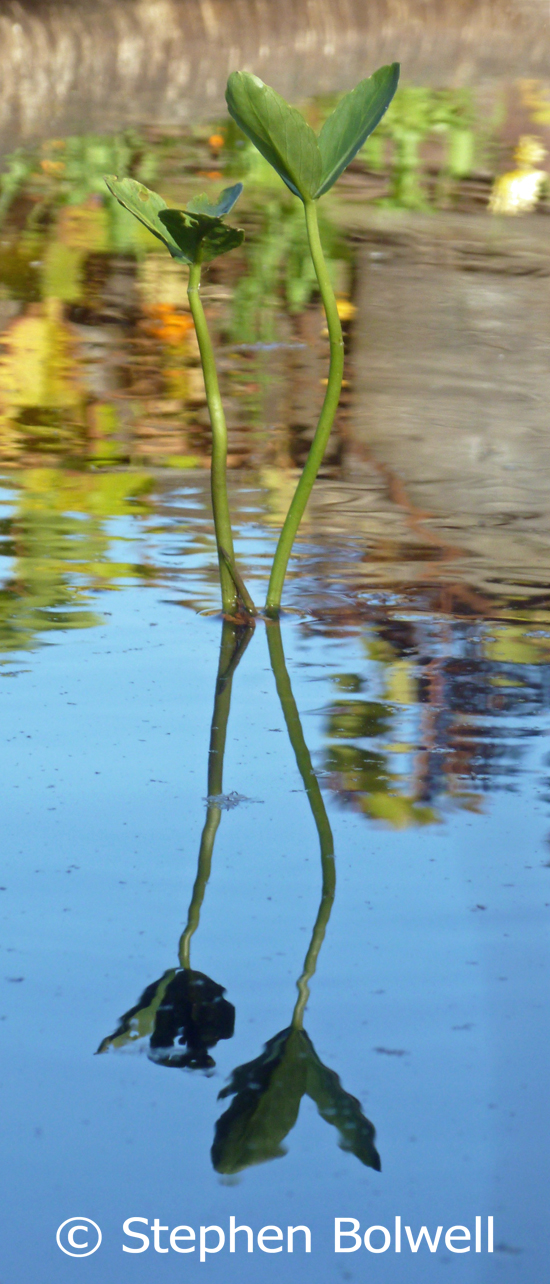
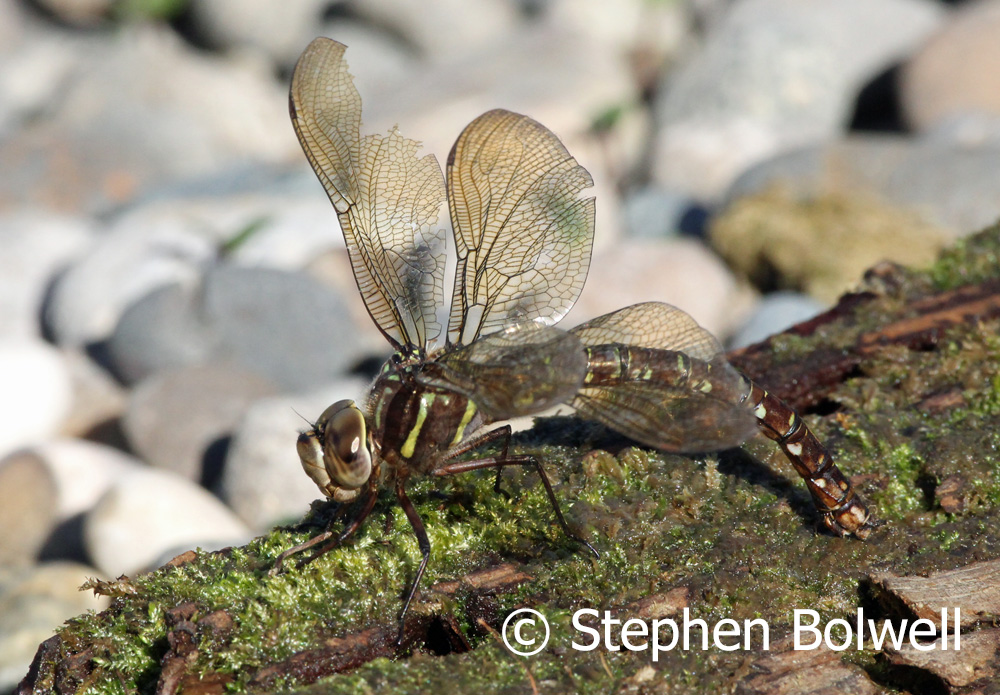
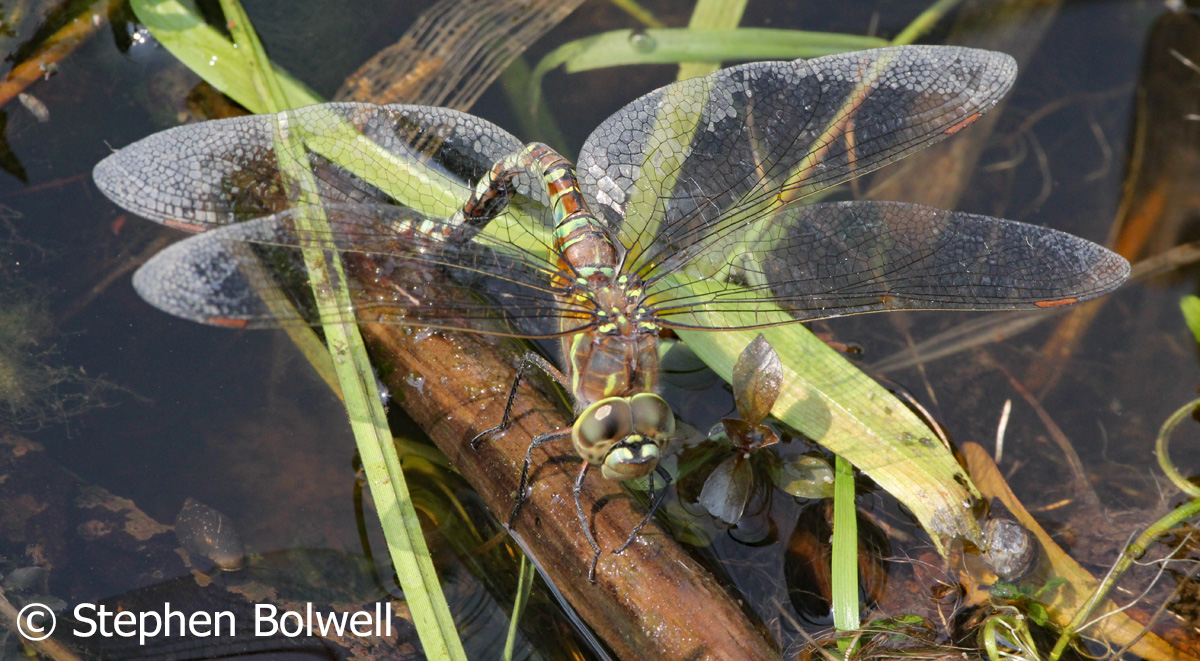
So, how are things changed by using a longer lens, a 400mm, which is relevant here because all of the dragonfly pictures taken in this article – bar one – were taken at this focal length. Put simply, the depth of field seems narrower than it does on a wider lens, but we’ve been through this and it’s just an illusion, but on the 400 mm lens the depth of field does becomes more critical when taking a close up of an egg laying dragonfly at a slight distance. This in contrast to the picture of the resting dragonfly I took on my Lumix camera (on the vine) which has better focus throughout because I was using a wide angle lens setting and and very close to the subject. i.e. a matter of inches rather than of feet as is the case with the telephoto pictures, this changes the perspective and makes a very different kind of picture.
Likewise the picture of the small water boatman taken on a 55mm macro lens works quite well because the lens is close and I’ve also managed the ‘depth of field’ by keeping the bugs body surface running along the same plane and thus narrowed ‘depth of field’ required to hold focus, but once this has been done focus once again becomes critical and there is no room for error.
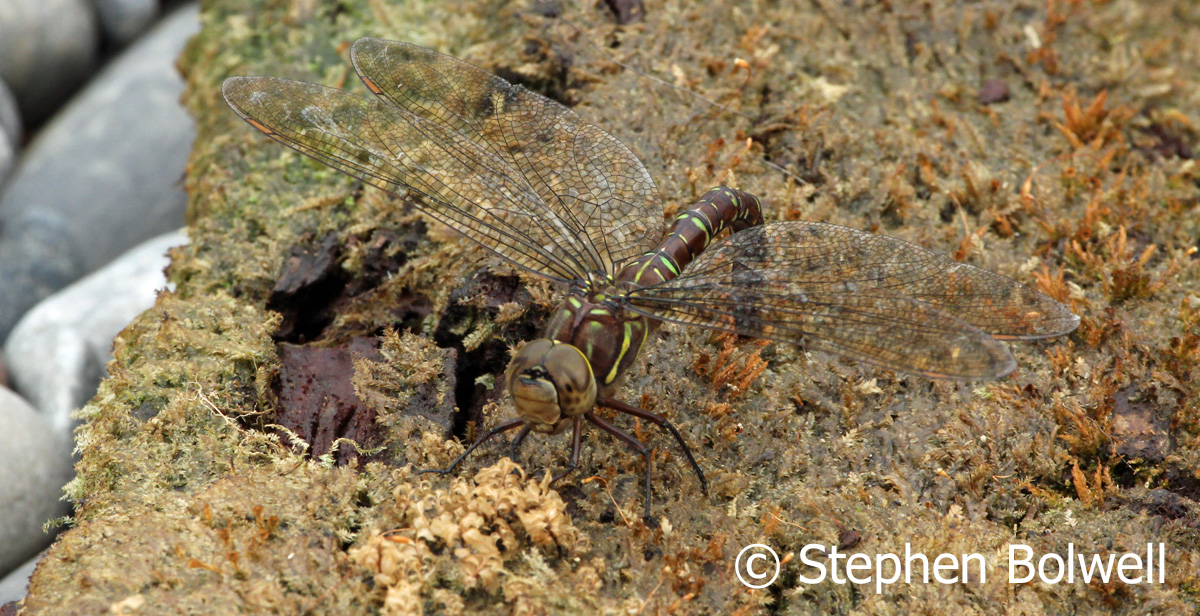
This picture was taken on f16 at 1/125 Sec. I selected midway long the body as my point of critical focus which allows most of the probing abdomen of the egg laying dragonfly to remain in focus, but the front end of the head is just beginning to lose it.
This picture was also taken at f16 at 1/125 Sec, but this time I have brought my critical focusing point forward – the head is in focus now, but the abdomen is going slightly out. The first picture is the nicer frame, but the second might be regarded as technically better… but of course, it also depends on how the picture is viewed. Blow the top picture up full frame as a page illustration and you might notice the head going soft, but used as a smaller picture it might well be considered the better image.
I am not against ‘happy accidents’, but it makes more sense to try to understand how best to deal with depth of field for your specific needs. Some photographers are less bothered about achieving this wide ranging depth of field and what I might chuck out they will feature – it’s a matter of taste. And if you just want to achieve a really crisp well lit image, then there’s always flash photography. Used correctly you won’t know the difference they tell you… Well, yes you will. I’ve never travelled down the ‘Chocolate Box School of Photography’ route, but many have, and their success rate is higher than mine. Everything in the end is a matter of opinion – it just depends on how you want to present your view of the world, using the artfulness of photography. There are really no right or wrong ways to take a picture – and if you are trying something different and it works… this has to be a plus.